eL Blue Gets Serious...
...about a lot of things. Here's a makeover of the Floor Console:
I needed a way to secure my 7" Galaxy Tab GT-P1000 to the floor console. Its display allows me to see information that the Spark EV does not provide through the DIC; battery data (temp, current, SOC, etc), charger temp/current/voltage/wattage, 12V battery SOC, date, altitude and more. All via Bluetooth connection to a Vgate Bluetooth Scan Tool OBD2 OBDII Scanner for TORQUE APP ANDROID and the Torque Pro app.
I also wanted to mount my iPhone somewhere within arm's reach but not docked in the typical fashion.
I also wanted to mount my iPhone somewhere within arm's reach but not docked in the typical fashion.
First version mount, tablet: I bought a Samsung Galaxy Tab Vehicle Dock. This dock is specific for this tablet, and includes a sliding power connector that allows the dock to charge the tablet whilst docked. Bought it used on Ebay for $15.


...a Wagan EL2537-5 Twin USB and 12-Volt DC Cup Holder Power Adapter:


Side view, rough draft:

The tablet mount blocks the cup holders. Not a worry, they're pretty small and don't hold a refillable water bottle, anyway (and there are cup holders in both front door panels).
Hmmm...
Also, the Wagan cup holder power adapter had to go. It did not anchor the Air Dock very well and exasperated its polar moment...I mean, the Air Dock would flop around a bit and the Wagan cup holder was unstable in the cup holder unless shimmed.


Above: Floor Console without and with Compartment. I cut out the forward wall of the Compartment using my Dremel + cutting wheel.
I made a false floor for the Compartment so that I could mount the Magnadyne unit which would then provide a mounting point for the tablet vehicle dock:


Above: I used an old plastic cutting board to cut out my false floor; the rubber mat from the Compartment made a perfect template. I extended the floor a few inches in order to mount the Magnadyne unit a bit forward.
Below: Trimming it up and mounting the false floor and then the Magnadyne:


Below: Test-fitting the tablet vehicle dock and Air Dock...


Below, more test-fitting:


Above: I notched the tablet vehicle dock with my dremel to accommodate the screws that mount it to the Magnadyne; drilled two holes in the Magnadyne and et vòila, it's mounted!
First test fit:
I found that the false floor was bumping into the metal mounts for the Console inside the car. Some slight trimming of the false floor solved that.
Below: looking at the bottom of the Compartment, here's where I had to trim with the dremel...

Next: The Air Dock/Cobra Flex Mount would rotate on its horizontal axis:

A clamp secures it:

More test-fitting: I discovered that the tablet vehicle dock was too far forward and would bind against the upper console, blocking the power port/USB port. To resolve, I mounted the tablet vehicle dock about 1.5 inches aft. Fits fine, now:

Below: The Console has a rubber mat; I reused it, slightly modified, to add a finishing touch:


Below: What it will look like:


Fitting into the car:
I must have test-fitted it 5 times; each time I found an issue that meant I had to take it out, back to the shop...:
Clip, clip here
Clip, clip there
We give the roughest claws
That certain air of savoir faire
In the merry old land of Oz...
...then back into the car for another test fit. Fortunately, the sun was shining, beautiful blue January sky, temps in the 30s ºF. The sun warmed the cabin of the car, no complaints.
The suction cup never held very well, and the tablet is heavy, so sticking it to the windshield was a non-starter. However, I was given one of these:

Rocketfish Universal GPS Dash Mount. Right. I stuck the tablet vehicle dock to the Rocketfish thingy and wedged the whole contraption into the floor console, just forward of the cup holders. It would almost stay there through all types of street driving...until the suction cup would let go and the tablet + vehicle dock would go flying across the footwell! This usually happened in very cold or very warm temps.
I needed a better solution. I got ambitious over the 2016 MLK holiday and came up with a very secure mounting system for both tablet and iPhone.
For the tablet, I wanted to mount the vehicle dock in the same basic location in the console, perhaps slightly lower/forward of the original position but without the Rocketfish thingy and without using the suction cup. Thinking about this for a very long time, it was obvious that I was going to have to remove the floor console and take it into my shop. So, let's get started.
Followed the repair manual to remove the floor console. It's just three phillips head screws. Hardest part was disconnecting the electrical connectors. They were not difficult to reach; however, I was unfamiliar with the way to disengage the connectors, so I had to crane my neck lying in an awkward position on the floor behind the front seats in order to see the connectors. Took a few minutes, but finally got them unhooked.
Put the console on my work table. Disassembled the old mounting system. Discarded Rocketfish thingy.

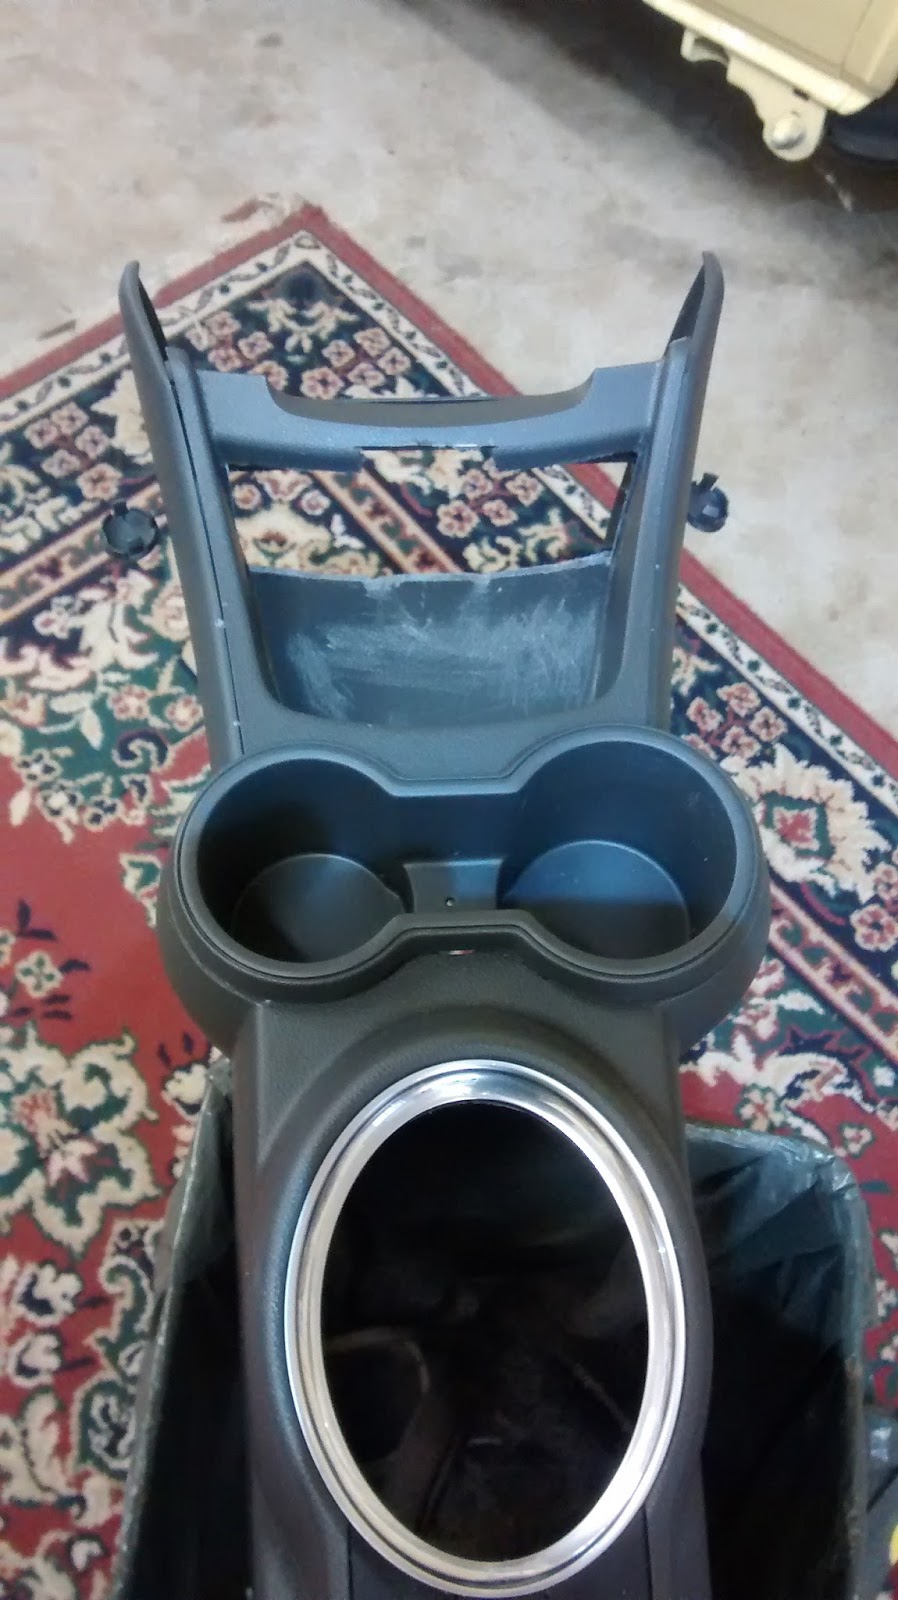
What you're looking at above, right, is what's called the "Compartment, Floor Console", according to Chevrolet. It's #2 below:

Best price I could find for it is $29.47. That is my backup plan. If I destroy mine, I can buy a new one. It is secured to the console with three hex head screws.
There are three other pieces of equipment that I had been using: a
Multi-Use Vehicle Charger with Dual USB Ports and Dual 12 Volt Sockets - Magnadyne:

...and an Air Dock 2.0 for the iPhone 5S:

I removed the Air Dock pad and mounted it to a Cobra Flex Mount:

Mating of the two created this:


Hmmm...
Also, the Wagan cup holder power adapter had to go. It did not anchor the Air Dock very well and exasperated its polar moment...I mean, the Air Dock would flop around a bit and the Wagan cup holder was unstable in the cup holder unless shimmed.

I made a false floor for the Compartment so that I could mount the Magnadyne unit which would then provide a mounting point for the tablet vehicle dock:


Below: Trimming it up and mounting the false floor and then the Magnadyne:


First test fit:
I found that the false floor was bumping into the metal mounts for the Console inside the car. Some slight trimming of the false floor solved that.
Below: looking at the bottom of the Compartment, here's where I had to trim with the dremel...


More test-fitting: I discovered that the tablet vehicle dock was too far forward and would bind against the upper console, blocking the power port/USB port. To resolve, I mounted the tablet vehicle dock about 1.5 inches aft. Fits fine, now:

Below: The Console has a rubber mat; I reused it, slightly modified, to add a finishing touch:


I must have test-fitted it 5 times; each time I found an issue that meant I had to take it out, back to the shop...:
Clip, clip here
Clip, clip there
We give the roughest claws
That certain air of savoir faire
In the merry old land of Oz...
...then back into the car for another test fit. Fortunately, the sun was shining, beautiful blue January sky, temps in the 30s ºF. The sun warmed the cabin of the car, no complaints.

Finishing touches:
I reconfigured Torque Pro's screens on the alert recommendation of my friend ChrisC; separated the "driving" screens and the "charging" screens. That way, the modules could be enlarged, making them easier to see at a glance.
However, there was still one mod left to do: the Motorola Moto G XT 1032 smartphone that runs BringGo (satnav app) needed a semi-permanent home. It had been residing in the driver's side console cup holder, plugged-in to USB for power; however, I never liked that location because it was non-secure.
I found a Forrader® C3 Qi Car Charger Cup Holder Wireless + Wired 2 in 1 Charger on Amazon that looked like it would be appropriate for the task (below):


Put them together for a test fit into the Console's rear cup holder: (below)


And then in the car (below):


Both tablet and Moto G run apps that help to save battery charge. Listed below:
Software:
- Autosleeper Auto power ON-OFF: runs on both. Senses when power is removed, starts a user-defined countdown timer that initiates deep sleep mode. I have it set for 60 sec.
- Autostart and StaY!: runs only on the tablet. Keeps Torque Pro in the foreground and starts it at bootup.
- LeanDroid: runs on both. Turns off cell/data radio since they're unused and unnecessary.
- Screen Timeout: runs only on the tablet. Keeps the screen from going to sleep.
Both devices are rooted, unlocked and running the latest Android OS. To date, the car can sit for a couple of days without use and the tablet will still have a charge; the phone will likely be dead, but it recharges rapidly and is quickly booted and back online. Modern USB protocol allows up to 2.1 A current into the device, and all the equipment used in this protocol perform to that standard. Recharging the batteries during use is not an issue. Both devices are treated as if they are part of the car's equipment (i.e., they remain in the car all the time...though I will remove them for updates, occasionally).
Neither device requires an Internet connection to function. I have them set so that they will connect automatically to known WiFi networks, and I have on occasion sat in parking lots like Starbucks or McDonalds and used their WiFi. I am testing using my iPhone's Personal Hotspot when on the road.
I do not do this kind of work professionally. I am therefore quite slow at just about every step in the process. I started Sat 01/16 sometime around 8PM; finished 01/18 around 430PM. I worked steady but took frequent breaks, sustained by hot tea and homemade pizza. All fasteners and materials were sourced from my shop.
Robert - Thanks for the detail account of how you did it. I wish I was as adventurous to try it on my 2015 Spark EV - which I bought just a month after you.
ReplyDelete